| Version 8 (modified by , 10 years ago) (diff) |
|---|
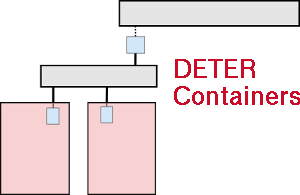
Installing Chef on DETER
There are 3 components to Chef: a server, a set of clients, and a set of workstations. The server is, well, the server - it handles requests from clients and workstations; it is the central organizing component of the system. The workstation is where Chef code is written. Think of it as a development or OPs workstation. The client(s) are the nodes that are configured/controlled. All three components need to run Chef sofware: the server runs chef server suite, the clients run chef-client, and the workstation runs git and a suite of chef scripts around git called knife that interact with a chef (git) repository and a chef server.
The workflow for a running system is recipes, roles, and chef code is written on a workstation and added to a chef repository. The person on the workstation then pushes updates to the chef server. The client then contacts the chef server for updates, gets the updates, and applies them locally. Knife, on a workstation, can also install Chef-client (and other packages) directly on a client. If this is done the flow becomes: 1) workstation pushes update to the server, 2) the workstation installs Chef on a client and gives it an initial role or list of recipes, 3) the newly installed chef-client then contacts the chef server and downloads the recipes and executes them, configuring the client node.
Swap in an experiment with at least three Ubuntu 12.04 nodes, one server, one workstation, and one client.
Chef Server
The server is simple to install: just use dpkg to install it.
> ssh server
> # if you don't want to hammer NFS, copy deb to /tmp first.
> sudo dpkg -i /share/chef/chef-server_11.0.12-1.ubuntu.12.04_amd64.deb
> sudo chef-server-ctl reconfigure
> sudo chef-server-ctl test
Chef Workstation
This can be the same machine as the server. First we install the package, then configure it. The configuration involves cloning the chef-repo git repository that has the DETER specific recipes. We also set up a trusted user and the appropriate keys.
Install Chef software:
> ssh workstation
> sudo dpkg -i /share/chef/chef_11.10.4-1.ubuntu.12.04_amd64.deb
> chef-client -v                # test - should show version.
Install git and the chef-repo:
> sudo apt-get install -y git   # chef uses git.
> sudo chmod g+w /local
> cd /local
> git clone /share/chef/chef-repo
> cd chef-repo
Take a look in /local/chef-repo/cookbooks/deter_node/recipes for the "deter_node" recipes. There is also a simple "deter_node" role in /local/chef-repo/roles/deter_node.rb that has a run_list that tells the node to execute the recipes in the correct order.
Now configure the workstation user and set up keys. Note that there *is* a web interface for this and that is the standard interface to use for this. Since it assumes you're running the browser locally though, you need to setup an ssh tunnel and a web proxy like Foxy-Proxy to access it. For this script though (and because we prefer it as it's scriptable) we stick to the command line. To do this though, we need to copy private keys. The procedure for using the web API copies public keys from a web page.
> mkdir .chef
> # copy keys!
> ssh server sudo cat /etc/chef-server/admin.pem > .chef/admin.pem
> ssh server sudo cat /etc/chef-server/chef-validator.pem  > .chef/chef-validator.pem
> # use knife to configure the account/workstation
> knife configure --initial
Answer the questions, substituting in your uid and server's control-net FQDN. A sample run is shown here:
> knife configure --initial
WARNING: No knife configuration file found
Where should I put the config file? [/users/glawler/.chef/knife.rb] /local/chef-repo/.chef/knife.rb
Please enter the chef server URL: [https://pc40.isi.deterlab.net:443] https://pc46.isi.deterlab.net:443
Please enter a name for the new user: [glawler]
Please enter the existing admin name: [admin]
Please enter the location of the existing admin's private key: [/etc/chef-server/admin.pem] /local/chef-repo/.chef/admin.pem
Please enter the validation clientname: [chef-validator]
Please enter the location of the validation key: [/etc/chef-server/chef-validator.pem] /local/chef-repo/.chef/chef-validator.pem
Please enter the path to a chef repository (or leave blank): /local/chef-repo
Creating initial API user...
Please enter a password for the new user:
Created user[glawler]
Configuration file written to /local/chef-repo/.chef/knife.rb
> # Validate server connection and user.
> knife user list
admin
glawler
>
Note that the knife command looks in ~/.chef and $(cwd)./chef for configuration files, so execute all knife commands from the /local/chef-repo directory or knife will be dull and not-happy.
Push the local roles and recipes to the chef server.
> cd /local/chef-repo
> knife cookbook upload hostsfile deter_node
Uploading hostsfile    [2.4.4]
Uploading deter_node   [0.1.1]
Uploaded 2 cookbooks.
> knife role from file roles/deter_node.rb
Updated Role deter_node!
> # Confirm things are OK.
> knife cookbook list
deter_node   0.1.1
hostsfile    2.4.4
> knife role list
deter_node
>
We are now going to use knife to bootstrap Chef unto a client machine. The usual Chef assumes internet connectivity and asks you to download a script and pipe it to sudo on the client. We will not be doing that.
> cd /local/chef-repo
> mkdir .chef/bootstrap
> cp /share/chef/ubuntu12.04-deb.erb .chef/bootstrap
The bootstrap usually grabs the package file from the internet. We give chef a custom bootstrap script that looks for it at users:8523. This means something on users must be listening on port 8523 and understand how to serve files via HTTPS. We use python for this. On users, cd to /share/chef and run python -m SimpleHTTPServer 8523. This starts a simple HTTP server on port 8523. If you want to run on your local server instead edit the file /local/chef-repo/.chef/bootstrap/ubuntu12.04-deb.erb, set the SERVER variable to the control net FQDN/ip address of your server and run the python simple server there.
Now run the bootstrap command to install and configure chef on the client. $NODE is the control net name of the client node, like pc33.isi.deterlab.net and $USER if your sudo-able user name, like glawler or faber.
> knife bootstrap $NODE -x $USER --sudo --distro ubuntu12.04-deb
Now kill the python SimpleHTTPServer process on users.
Confirm the node has chef installed and configured by running this knife command on your workstation machine. It should show the client node.
> cd /local/chef-repo
> knife client list
chef-validator
chef-webui
pc33.isi.deterlab.net
> # show the node information:
> knife node show pc33.isi.deterlab.net
Node Name:   pc33.isi.deterlab.net
Environment: _default
FQDN:        pc33.isi.deterlab.net
IP:          192.168.1.33
Run List:
Roles:
Recipes:
Platform:    ubuntu 12.04
Tags:
Now we assign recipes or a role to the client node and tell it to configure itself. (Note this could've been done during the bootstrap via the -r argument.
workstation$ knife node run_list add pc33.isi.deterlab.net 'role[deter_node]'
pc33.isi.deterlab.net:
  run_list: role[deter_node]
Chef Client(s)
These machines should be different than the server and workstation. There are three ways to install chef on a client. 1) simply use whatever package system exists for the client OS and install the chef software. 2) Use a chef workstation to push platform specific chef software to the client that installs and configures it. 3) Use the chef supplied script that reaches out to the internet and executes arbitrary commands on the machine as root. We will use method 2) to give a flavor of installing chef by force on unsuspecting nodes on DETER (as this is the most flexible and useful installation method in the DETER context).
> # already installed via knife bootstrap!
Running Chef on DETER
Note: the recipes here use a mysql library to talk directly to the testbed database. On the current DETER testbed though, the database is setup to only allow local access from boss. The TMCD/TMCC library is used to bridge the gap between test nodes and the database on boss. The recipes can be rewritten to use the TMCD interface but this was an exercise in trying to cut out Emulab code, a decision was made to talk directly to the database using standard database APIs. In short, the steps below cannot be run on DETER unless the database on boss is reconfigured to allow external access. Instructions are given for that below though.
- Getting recipes
- Pushing recipes
- Running recipes