| 13 | | users: > cd src |
| 14 | | users: > git clone https://github.com/deter-project/config_server.git |
| 15 | | }}} |
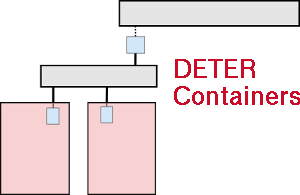
| 16 | | 1. Create an experiment in which to run your containers. There are two modes: using the existing containers system or not using it. Neo-continainers uses the existing containers system to figure out more complex network topologies. If you just want containers "hanging off" your physical nodes and can compute IP addresses for your containers by hand, you do not need to use the existing containers system at all. Use 2a for an existing containers experiment. Use 2b for a standard NS-file based DETER experiment. |
| 17 | | a. Create an experiment using the existing containers system. Creat a containerized experiment with an NS file and the {{{/share/containers/containerize.py}}} script. |
| 18 | | |
| 19 | | In your NS file for each container in the experiment, specify {{{image_os}}}, {{{image_type}}}, {{{image_name}}}, and {{{image_url}}} via the {{{tb-add-node-attribute}}} syntax. Details on each attribute is given below. |
| 20 | | * {{{image_os}}} - This is really just to distinguish Windows from non-Windows nodes. If the {{{image_os}}} starts with "{{{windows}}}", the image will be treated as a Windows node. Otherwise it'll be assumed to be some sort of Unix-y container. |
| 21 | | * {{{image_type}}} - This setting describes the containerization tech of the node. Currently this is *always* set to "{{{vagrant}}}" as Vagrant is the only package used to spin up the containers. |
| 22 | | * {{{image_name}}} - The name of the image. Any containers that share a name will also share an image. |
| 23 | | * {{{image_url}}} - A URL must be specified which the neo-containers system uses to download the container image. This URL must be resolvable from the experiment nodes. The image will only be downloaded once as long as the {{{image_name}}}s are the same for each container. Existing and supported images are Ubuntu 14.04 64 @ {{{http://scratch/containers/deter_ub1404_64_vb.box}}} and Windows 7 @ {{{http://scratch/containers/deter_win7.box}}}. |
| 24 | | Here is an example that creates Windows and Ubuntu 14.04 containers: |
| 25 | | {{{ |
| 26 | | set r2d2 [$ns node] |
| 27 | | tb-add-node-attribute $r2d2 containers:image_os windows |
| 28 | | tb-add-node-attribute $r2d2 containers:image_type vagrant |
| 29 | | tb-add-node-attribute $r2d2 containers:image_name deter/win7 |
| 30 | | tb-add-node-attribute $r2d2 containers:image_url http://scratch/containers/deter_win7.box |
| 31 | | |
| 32 | | set c3po [$ns node] |
| 33 | | tb-add-node-attribute $c3po containers:image_os ubuntu |
| 34 | | tb-add-node-attribute $c3po containers:image_type vagrant |
| 35 | | tb-add-node-attribute $c3po containers:image_name ubuntu/trusty64 |
| 36 | | tb-add-node-attribute $c3p0 containers:image_url http://scratch/containers/deter_ub1404_64_vb.box |
| 37 | | }}} |
| 38 | | |
| 39 | | b. Create an experiment without using the existing containers system. Just create an NS file with a fully connected network. Use the PNODE-BASE image for all machines on which you want to run containers. Create a JSON file which describes your containers. It's a list of containers. For each container you must specify the {{{host}}} (machine it runs on), {{{interfaces}}} in addition to the parameters from 2a above. |
| 40 | | {{{ |
| 41 | | [ |
| 42 | | { |
| 43 | | "host": "alice", |
| 44 | | "name": "xanadu", |
| 45 | | "image_url": "http://scratch/containers/deter_win7.box" |
| 46 | | "image_os": "windows", |
| 47 | | "image_type": "vagrant", |
| 48 | | "image_name": "deter/win7", |
| 49 | | "interfaces": [ |
| 50 | | { "address": "10.1.1.200", "mac": "de:ad:be:ef:00:ae" } |
| 51 | | ] |
| 52 | | }, |
| 53 | | { |
| 54 | | "host": "alice", |
| 55 | | "name": "grease", |
| 56 | | "image_url": "http://scratch/containers/deter_win7.box" |
| 57 | | "image_os": "windows", |
| 58 | | "image_type": "vagrant", |
| 59 | | "image_name": "deter/win7", |
| 60 | | "interfaces": [ |
| 61 | | { "address": "10.1.1.201", "mac": "de:ad:be:ef:00:af" } |
| 62 | | ] |
| 63 | | }, |
| 64 | | { |
| 65 | | "host": "bob", |
| 66 | | "name": "maisie", |
| 67 | | "image_url": "http://scratch/containers/deter_ub1404_64_vb.box", |
| 68 | | "image_os": "ubuntu 14.04 64", |
| 69 | | "image_type": "vagrant", |
| 70 | | "image_name": "deter/ub14", |
| 71 | | "interfaces": [ |
| 72 | | { "address": "10.1.1.101", "mac": "de:ad:be:ef:00:be" } |
| 73 | | ] |
| 74 | | }, |
| 75 | | { |
| 76 | | "host": "bob", |
| 77 | | "name": "olive", |
| 78 | | "image_url": "http://scratch/containers/deter_ub1404_64_vb.box", |
| 79 | | "image_os": "ubuntu 14.04 64", |
| 80 | | "image_type": "vagrant", |
| 81 | | "image_name": "deter/ub14", |
| 82 | | "interfaces": [ |
| 83 | | { "address": "10.1.1.102", "mac": "de:ad:be:ef:00:bf" } |
| 84 | | ] |
| 85 | | } |
| 86 | | ] |
| 87 | | }}} |
| 88 | | This example creates four containers on two host nodes.[[BR]] If using this mode, skip steps 3 and 4. |
| 89 | | |
| 90 | | 3. Use the NS file to create a containerized experiment using the existing containers scripts (on users): {{{/share/containers/containerize.py [group] [experiment] [ns file]}}}. Note that the experiment must currently be created in the {{{Deter}}} group as that's where the custom pnode disk images are. This will change. |
| 91 | | 4. Modify the NS file generated by {{{containerize.py}}} to have a new image for the pnode machines. Navigate to the new experiment page and click {{{Modify Experiment}}}. Change the OS type of the pnodes to {{{PNODE_BASE}}} and the hardware type to {{{MicroCloud}}}. I.e. for each pnode in the NS file, make the lines have the form: |
| 92 | | {{{ |
| | 2 | #!html |
| | 3 | <html> |
| | 4 | <head> |
| | 5 | <title>NeoContainers -- Docs Reorganized</title> |
| | 6 | </head> |
| | 7 | |
| | 8 | <body> |
| | 9 | |
| | 10 | <h1>Neo-Containers -- DETER Containers</h1> |
| | 11 | |
| | 12 | <h2>Section List</h2> |
| | 13 | |
| | 14 | <ol> |
| | 15 | <li>The Basics |
| | 16 | <li>Initial Set-up |
| | 17 | <li>Using Neo-Containers with the Existing Containers System |
| | 18 | <li>Using Neo-Containers While Bypassing the Existing Containers System |
| | 19 | <li>After Booting the Containers |
| | 20 | <li>Experiment Completion |
| | 21 | <li>Extensions to Neo-Containers |
| | 22 | </ol> |
| | 23 | |
| | 24 | <p> |
| | 25 | |
| | 26 | <!------------------------------------------------------------------------> |
| | 27 | |
| | 28 | <h2>1. The Basics</h2> |
| | 29 | |
| | 30 | <p> |
| | 31 | |
| | 32 | The Neo-Containers system uses cloud-container technology to abstract and |
| | 33 | generalize container creation and initialization. At the DETER level, the |
| | 34 | experiments have a number of physical nodes, "pnodes", which serve as hosts |
| | 35 | for the virtualized containers. Outside of the experiment there are two |
| | 36 | servers which configure the containers. Both run on |
| | 37 | <code>chef.isi.deterlab.net</code>. The Chef server serves "code as |
| | 38 | configuration" and stores static (for the most part) configuration |
| | 39 | information. The <code>config_server</code> is a RESTful API which loads then |
| | 40 | serves experiment-specific configuration information. The code that the Chef |
| | 41 | server runs on the containers usually pull the specific configuration |
| | 42 | information from the <code>config_server</code>. |
| | 43 | |
| | 44 | <p> |
| | 45 | |
| | 46 | The <code>config_server</code> code can be found on DETER's Github account. |
| | 47 | The Chef recipes used are there as well. |
| | 48 | |
| | 49 | <p> |
| | 50 | |
| | 51 | There are two approaches to running Neo-Containers. The first is expands |
| | 52 | upon the existing Containers system; the second does not use the existing |
| | 53 | Containers system at all. Following the discussion on |
| | 54 | <a href="#initial">initial set-up</a>, there are separate sections below |
| | 55 | describing how to use Neo-Containers in each case. |
| | 56 | |
| | 57 | <p> |
| | 58 | |
| | 59 | Much of the Neo-Containers system is still exposed and require the user to |
| | 60 | run a few configuration scripts. In the fullness of time, these details will |
| | 61 | be folded in to the system. |
| | 62 | |
| | 63 | <p> |
| | 64 | |
| | 65 | <!------------------------------------------------------------------------> |
| | 66 | |
| | 67 | <a name="initial"></a> |
| | 68 | <h2>2. Initial Set-up</h2> |
| | 69 | |
| | 70 | <p> |
| | 71 | |
| | 72 | Check out the <code>config_server</code> repository from Github. This |
| | 73 | repository contains the <code>config_server</code> code, as well as several |
| | 74 | scripts that must be run. |
| | 75 | |
| | 76 | <p> |
| | 77 | |
| | 78 | It is assumed this will be checked out on <code>users.isi.deterlab.net</code>. |
| | 79 | |
| | 80 | <p> |
| | 81 | |
| | 82 | <pre> |
| | 83 | $ mkdir src |
| | 84 | $ cd src |
| | 85 | $ git clone https://github.com/deter-project/config_server.git |
| | 86 | </pre> |
| | 87 | |
| | 88 | <p> |
| | 89 | |
| | 90 | <!------------------------------------------------------------------------> |
| | 91 | |
| | 92 | <a name="existing-old-containers"></a> |
| | 93 | <h2>3. Using Neo-Containers with the Existing Containers System</h2> |
| | 94 | |
| | 95 | <p> |
| | 96 | |
| | 97 | This method of using Neo-Containers uses the existing Containers system. |
| | 98 | This method allows the use of more complex network topologies. |
| | 99 | |
| | 100 | <p> |
| | 101 | |
| | 102 | <!-----------------------------------------------> |
| | 103 | |
| | 104 | <h3>Create an Experiment</h3> |
| | 105 | |
| | 106 | <p> |
| | 107 | |
| | 108 | Create an experiment using the existing Containers system. An NS file |
| | 109 | and the <b>/share/containers/containerize.py</b> script are used to create |
| | 110 | the containerized experiment. |
| | 111 | |
| | 112 | <p> |
| | 113 | |
| | 114 | In your NS file for each container, specify <i>image_os</i>, |
| | 115 | <i>image_type</i>, <i>image_name</i>, and <i>image_url</i> via the |
| | 116 | <i>tb-add-node-attribute</i> syntax. Details on each attribute are |
| | 117 | given below. |
| | 118 | |
| | 119 | <p> |
| | 120 | |
| | 121 | <ul> |
| | 122 | |
| | 123 | <li><i>image_os</i> - This is really just to distinguish Windows from |
| | 124 | non-Windows nodes. If the <i>image_os</i> starts with "windows", the image |
| | 125 | will be treated as a Windows node. Otherwise it'll be assumed to be some sort |
| | 126 | of Unix-y container. |
| | 127 | |
| | 128 | <p> |
| | 129 | |
| | 130 | <li><i>image_type</i> - This setting describes the containerization tech of |
| | 131 | the node. Currently this is *always* set to "vagrant" as Vagrant is the only |
| | 132 | package used to spin up the containers. |
| | 133 | |
| | 134 | <p> |
| | 135 | |
| | 136 | <li><i>image_name</i> - The name of the image. Any containers that share a |
| | 137 | name will also share an image. |
| | 138 | |
| | 139 | <p> |
| | 140 | |
| | 141 | <li><i>image_url</i> - A URL must be specified which the neo-containers system |
| | 142 | uses to download the container image. This URL must be resolvable from the |
| | 143 | experiment nodes. The image will only be downloaded once as long as the |
| | 144 | <i>image_name</i>s are the same for each container. Existing and supported |
| | 145 | images are Ubuntu 14.04 64 |
| | 146 | (at <code>http://scratch/containers/deter_ub1404_64_vb.box)</code> |
| | 147 | and Windows 7 (at <code>http://scratch/containers/deter_win7.box</code>). |
| | 148 | |
| | 149 | </ul> |
| | 150 | |
| | 151 | <p> |
| | 152 | |
| | 153 | The following is an example NS file that creates one Windows container and |
| | 154 | one Ubuntu 14.04 container: |
| | 155 | |
| | 156 | <p> |
| | 157 | |
| | 158 | <pre> |
| | 159 | set r2d2 [$ns node] |
| | 160 | tb-add-node-attribute $r2d2 containers:image_os windows |
| | 161 | tb-add-node-attribute $r2d2 containers:image_type vagrant |
| | 162 | tb-add-node-attribute $r2d2 containers:image_name deter/win7 |
| | 163 | tb-add-node-attribute $r2d2 containers:image_url |
| | 164 | http://scratch/containers/deter_win7.box |
| | 165 | |
| | 166 | set c3po [$ns node] |
| | 167 | tb-add-node-attribute $c3po containers:image_os ubuntu |
| | 168 | tb-add-node-attribute $c3po containers:image_type vagrant |
| | 169 | tb-add-node-attribute $c3po containers:image_name ubuntu/trusty64 |
| | 170 | tb-add-node-attribute $c3p0 containers:image_url |
| | 171 | http://scratch/containers/deter_ub1404_64_vb.box |
| | 172 | </pre> |
| | 173 | |
| | 174 | <p> |
| | 175 | |
| | 176 | <!-----------------------------------------------> |
| | 177 | |
| | 178 | <h3>Containerize the Experiment</h3> |
| | 179 | |
| | 180 | <p> |
| | 181 | |
| | 182 | Use the NS file to create a containerized experiment using the existing |
| | 183 | Containers scripts. |
| | 184 | |
| | 185 | <p> |
| | 186 | |
| | 187 | <pre> |
| | 188 | $ /share/containers/containerize.py <group> <experiment> <ns-file> |
| | 189 | </pre> |
| | 190 | |
| | 191 | <p> |
| | 192 | |
| | 193 | <b>Note:</b> The experiment must currently be created in the Deter group |
| | 194 | as that's where the custom <i>pnode</i> disk images are. This will change. |
| | 195 | |
| | 196 | <p> |
| | 197 | |
| | 198 | <!-----------------------------------------------> |
| | 199 | |
| | 200 | <h3>Finalize the NS File</h3> |
| | 201 | |
| | 202 | <p> |
| | 203 | |
| | 204 | Modify the NS file generated by <b>containerize.py</b> to have a new image for |
| | 205 | the <i>pnode</i> machines. |
| | 206 | |
| | 207 | <p> |
| | 208 | |
| | 209 | Follow these steps in your browser: |
| | 210 | |
| | 211 | <ol> |
| | 212 | |
| | 213 | <li>Go to the new experiment page. |
| | 214 | |
| | 215 | <li>Click <i>Modify Experiment</i>. |
| | 216 | |
| | 217 | <li>Remove all existing <i>tb-set-node-startcmd</i> lines.<br> These start |
| | 218 | the old Containers system and are no longer used. |
| | 219 | <li>For each <i>pnode</i>, change the OS type to PNODE_BASE. |
| | 220 | |
| | 221 | <li>For each <i>pnode</i>, change the hardware type to MicroCloud. |
| | 222 | |
| | 223 | </ol> |
| | 224 | |
| | 225 | <p> |
| | 226 | |
| | 227 | After making these modifications, each pnode in the NS file should have |
| | 228 | these lines: |
| | 229 | |
| | 230 | <pre> |
| | 233 | </pre> |
| | 234 | |
| | 235 | <p> |
| | 236 | |
| | 237 | <center> |
| | 238 | <b><i> |
| | 239 | This is straight from the original Neo-Containers documentation, but the |
| | 240 | OS types don't match.<br> |
| | 241 | One line says to use "PNODE_BASE" and the other says |
| | 242 | to use "PNODE-CONT".<br> |
| | 243 | The wrong one must be fixed. |
| | 244 | </i></b> |
| | 245 | </center> |
| | 246 | |
| | 247 | <p> |
| | 248 | |
| | 249 | The final NS file will look something like this: |
| | 250 | |
| | 251 | <pre> |
| | 252 | set ns [new Simulator] |
| | 253 | source tb_compat.tcl |
| | 254 | |
| | 255 | tb-make-soft-vtype container0 {dl380g3 pc2133 MicroCloud} |
| | 256 | set pnode(0000) [$ns node] |
| | 257 | tb-set-node-os ${pnode(0000)} PNODE-BASE |
| | 258 | tb-set-hardware ${pnode(0000)} container0 |
| | 259 | tb-set-node-failure-action ${pnode(0000)} "nonfatal" |
| | 260 | |
| | 261 | $ns rtproto Static |
| | 262 | $ns run |
| | 263 | </pre> |
| | 264 | |
| | 265 | <p> |
| | 266 | |
| | 267 | <!-----------------------------------------------> |
| | 268 | |
| | 269 | <h3>Swap In</h3> |
| | 270 | |
| | 271 | <p> |
| | 272 | |
| | 273 | On the experiment's webpage, swap in the experiment. |
| | 274 | |
| | 275 | <p> |
| | 276 | |
| | 277 | <!-----------------------------------------------> |
| | 278 | |
| | 279 | <h3>Populate the Configuration Database</h3> |
| | 280 | |
| | 281 | <p> |
| | 282 | |
| | 283 | Populate the configuration database that runs on |
| | 284 | <code>chef.isi.deterlab.net</code> by running the <b>load_containers_db.sh</b> |
| | 285 | and <b>load_config_db.sh</b> database-population scripts. |
| | 286 | |
| | 287 | <p> |
| | 288 | |
| | 289 | This should be run on a single physical node in the experiment. |
| | 290 | <code>pnode-0000</code> is used in the example below. |
| | 291 | |
| | 292 | <p> |
| | 293 | |
| | 294 | The <i><expid></i> and <i><projid></i> fields in the following |
| | 295 | example are referring to the experiment ID and the project ID. The |
| | 296 | experiment ID is defined by the user, and could be something like |
| | 297 | "neocont-test" or "netstriping". For now, the project ID should always |
| | 298 | be "Deter". |
| | 299 | |
| | 300 | <p> |
| | 301 | |
| | 302 | <pre> |
| | 303 | $ ssh pnode-0000.<i><expid></i>.<i><projid></i> |
| | 304 | $ cd <i><config_server-repo></i>/bin |
| | 305 | $ ./load_config_db.sh |
| | 306 | $ ./load_containers_db.sh -p <i><projid></i> -e <i><expid></i> |
| | 307 | </pre> |
| | 308 | |
| | 309 | <p> |
| | 310 | |
| | 311 | This step will be automated in the future. |
| | 312 | |
| | 313 | <p> |
| | 314 | |
| | 315 | <!-----------------------------------------------> |
| | 316 | |
| | 317 | <h3>Node Configuration by Chef</h3> |
| | 318 | |
| | 319 | <p> |
| | 320 | |
| | 321 | The Chef system is used to bootstrap and configure the nodes. All the |
| | 322 | steps for this are enclosed in the <b>bootstrap_node.sh</b> script. |
| | 323 | |
| | 324 | <p> |
| | 325 | |
| | 326 | The script needs to know which node's role in the experiment. There |
| | 327 | are currently three roles: <i>pnode</i>, <i>container</i>, and |
| | 328 | <i>win-container</i>. |
| | 329 | |
| | 330 | <p> |
| | 331 | |
| | 332 | On all the <i>pnode</i>s: |
| | 333 | |
| | 334 | <pre> |
| | 335 | $ ssh <i><pnode></i>.<i><expid></i>.<i><projid></i> |
| | 336 | $ cd <i><config_server-repo></i>/bin |
| | 337 | $ ./bootstrap_node.sh -r pnode |
| | 338 | </pre> |
| | 339 | |
| | 340 | <p> |
| | 341 | |
| | 342 | <center><b><i> |
| | 343 | Is this needed on <u>all</u> the <i>pnode</i>s or just those that are running containers? |
| | 344 | </i></b></center> |
| | 345 | |
| | 346 | <p> |
| | 347 | |
| | 348 | The <i>pnode</i> role will spawn the containers and configure them. |
| | 349 | |
| | 350 | <p> |
| | 351 | |
| | 352 | It is easy to fix problems if something should go wrong with bootstrapped |
| | 353 | nodes. Running "sudo chef-client" will re-configure the nodes (both |
| | 354 | <i>pnode</i>s and the containers). |
| | 355 | |
| | 356 | <p> |
| | 357 | |
| | 358 | <center><b><i> |
| | 359 | This is really inspecific. Are there any limitations to what "sudo |
| | 360 | chef-client" will fix? |
| | 361 | </i></b></center> |
| | 362 | |
| | 363 | <p> |
| | 364 | |
| | 365 | <!-----------------------------------------------> |
| | 366 | |
| | 367 | <h3>Set-up Complete</h3> |
| | 368 | |
| | 369 | <p> |
| | 370 | |
| | 371 | If all the preceding steps succeeded, then your <i>pnode</i>s and containers |
| | 372 | are configured, booted, and ready for use. |
| | 373 | |
| | 374 | <p> |
| | 375 | |
| | 376 | <!------------------------------------------------------------------------> |
| | 377 | |
| | 378 | <hr> |
| | 379 | <p> |
| | 380 | |
| | 381 | <a name="absent-old-containers"></a> |
| | 382 | <h2>4. Using Neo-Containers While Bypassing the Existing Containers System</h2> |
| | 383 | |
| | 384 | <p> |
| | 385 | |
| | 386 | This method of using Neo-Containers does not use the existing Containers |
| | 387 | system. This method allows the containers to be associated with physical |
| | 388 | nodes. It requires the user to manually compute IP addresses for the |
| | 389 | container nodes. Standard NS files are used in DETER experiments in this |
| | 390 | method of using Neo-Containers. |
| | 391 | |
| | 392 | <p> |
| | 393 | |
| | 394 | <!-----------------------------------------------> |
| | 395 | |
| | 396 | <h3>Create an Experiment</h3> |
| | 397 | |
| | 398 | <p> |
| | 399 | |
| | 400 | Create an experiment without using the existing Containers system. This |
| | 401 | experiment requires an NS file with a fully connected network. The |
| | 402 | PNODE-BASE image must be used for all machines which will run containers. |
| | 403 | The NS file must be loaded into the DETER system in the usual way. |
| | 404 | |
| | 405 | <p> |
| | 406 | |
| | 407 | Example NS file: |
| | 408 | |
| | 409 | <p> |
| | 410 | |
| | 411 | <pre> |
| | 412 | set ns [new Simulator] |
| | 413 | source tb_compat.tcl |
| | 414 | |
| | 415 | set nodes "leda swan" |
| | 416 | |
| | 417 | tb-make-soft-vtype pnode_hardware {pc2133 MicroCloud} |
| | 418 | |
| | 419 | foreach node $nodes { |
| | 420 | set $node [$ns node] |
| | 421 | tb-set-node-os $node PNODE-BASE |
| | 422 | tb-set-hardware $node pnode_hardware |
| | 423 | } |
| | 424 | |
| | 425 | set lan0 [$ns make-lan $nodes 100Mb 0ms] |
| | 426 | |
| | 427 | $ns rtproto Static |
| | 428 | $ns run |
| | 429 | </pre> |
| | 430 | |
| | 431 | <p> |
| | 432 | |
| | 433 | <!-----------------------------------------------> |
| | 434 | |
| | 435 | <h3>Create a <b>nodes.json</b> File</h3> |
| | 436 | |
| | 437 | <p> |
| | 438 | |
| | 439 | A <b>nodes.json</b> file must be created that will describe the containers |
| | 440 | in the experiment. This file is only used to define the containers for this |
| | 441 | experiment. (The file need not be named <b>nodes.json</b>, but that |
| | 442 | is the name that will be used in this documentation.) |
| | 443 | |
| | 444 | <p> |
| | 445 | |
| | 446 | Each node must have the following fields defined in the <b>nodes.json</b> |
| | 447 | file. |
| | 448 | |
| | 449 | <p> |
| | 450 | |
| | 451 | <ul> |
| | 452 | |
| | 453 | <li><i>name</i> - This is the name of this container. |
| | 454 | |
| | 455 | <p> |
| | 456 | |
| | 457 | <li><i>host</i> - This is the <i>pnode</i> on which this container will run. |
| | 458 | |
| | 459 | <p> |
| | 460 | |
| | 461 | <li><i>interfaces</i> - This a list of the network interfaces to be assigned |
| | 462 | the container. |
| | 463 | |
| | 464 | <p> |
| | 465 | |
| | 466 | <li><i>image_os</i> - This is really just to distinguish Windows from |
| | 467 | non-Windows nodes. If the <i>image_os</i> starts with "windows", the image |
| | 468 | will be treated as a Windows node. Otherwise it'll be assumed to be some sort |
| | 469 | of Unix-y container. |
| | 470 | |
| | 471 | <p> |
| | 472 | |
| | 473 | <li><i>image_type</i> - This setting describes the containerization tech of |
| | 474 | the node. Currently this is *always* set to "vagrant" as Vagrant is the only |
| | 475 | package used to spin up the containers. |
| | 476 | |
| | 477 | <p> |
| | 478 | |
| | 479 | <li><i>image_name</i> - The name of the image. Any containers that share a |
| | 480 | name will also share an image. |
| | 481 | |
| | 482 | <p> |
| | 483 | |
| | 484 | <li><i>image_url</i> - A URL must be specified which the neo-containers system |
| | 485 | uses to download the container image. This URL must be resolvable from the |
| | 486 | experiment nodes. The image will only be downloaded once as long as the |
| | 487 | <i>image_name</i>s are the same for each container. Existing and supported |
| | 488 | images are Ubuntu 14.04 64 |
| | 489 | (at <code>http://scratch/containers/deter_ub1404_64_vb.box)</code> |
| | 490 | and Windows 7 (at <code>http://scratch/containers/deter_win7.box</code>). |
| | 491 | |
| | 492 | </ul> |
| | 493 | |
| | 494 | <p> |
| | 495 | |
| | 496 | The following is an example <b>nodes.json</b> file that creates |
| | 497 | one Ubuntu 14.04 container and one Windows container: |
| | 498 | |
| | 499 | <p> |
| | 500 | |
| | 501 | <pre> |
| | 502 | |
| | 503 | [ |
| | 504 | { |
| | 505 | "host": "leda", |
| | 506 | "name": "sarah", |
| | 507 | "image_url": "http://scratch/containers/deter_ub1404_64_vb.box", |
| | 508 | "image_os": "ubuntu 14.04 64", |
| | 509 | "image_type": "vagrant", |
| | 510 | "image_name": "deter/ub14", |
| | 511 | "interfaces": [ |
| | 512 | { "address": "10.1.1.101", "mac": "de:ad:be:ef:00:be" } |
| | 513 | ] |
| | 514 | }, |
| | 515 | { |
| | 516 | "host": "swan", |
| | 517 | "name": "helena", |
| | 518 | "image_url": "http://scratch/containers/deter_win7_candidate.box" |
| | 519 | "image_os": "windows", |
| | 520 | "image_type": "vagrant", |
| | 521 | "image_name": "deter/win7", |
| | 522 | "interfaces": [ |
| | 523 | { "address": "10.1.1.201", "mac": "de:ad:be:ef:00:af" } |
| | 524 | ] |
| | 525 | } |
| | 526 | ] |
| | 527 | </pre> |
| | 528 | |
| | 529 | <p> |
| | 530 | |
| | 531 | <!-----------------------------------------------> |
| | 532 | |
| | 533 | <h3>Load Containers into DETER</h3> |
| | 534 | |
| | 535 | <p> |
| | 536 | |
| | 537 | DETER must allocate the control network address for the containers prior to |
| | 538 | experiment swap-in. This allocation occurs by passing the <b>nodes.json</b> |
| | 539 | file to DETER. |
| | 540 | |
| | 541 | <p> |
| | 542 | |
| | 543 | The <i><expid></i> and <i><projid></i> fields in the following |
| | 544 | example are referring to the experiment ID and the project ID. The |
| | 545 | experiment ID is defined by the user, and could be something like |
| | 546 | "neocont-test" or "netstriping". For now, the project ID should always |
| | 547 | be "Deter". |
| | 548 | |
| | 549 | <p> |
| | 550 | |
| | 551 | <pre> |
| | 552 | $ cd <i><config_server-repo></i>/bin |
| | 553 | $ ./load_containers_db.sh -p <i><projid></i> -e <i><expid></i> |
| | 554 | </pre> |
| | 555 | |
| | 556 | <p> |
| | 557 | |
| | 558 | This must only be done once per experiment. It does not have to be done |
| | 559 | before each swap-in. Just once to reserve control net addresses from DETER. |
| | 560 | |
| | 561 | <p> |
| | 562 | |
| | 563 | <center><b><i> |
| | 564 | What about when the <b>nodes.json</b> changes? Does the full thing have to |
| | 565 | be re-run? Is a supplementary JSON file the only thing that must be added? |
| | 566 | Must the experiment be terminated and all the steps started over? |
| | 567 | </i></b></center> |
| | 568 | |
| | 569 | <p> |
| | 570 | |
| | 571 | <!-----------------------------------------------> |
| | 572 | |
| | 573 | <h3>Swap In</h3> |
| | 574 | |
| | 575 | <p> |
| | 576 | |
| | 577 | On the experiment's webpage, swap in the experiment. |
| | 578 | <p> |
| | 579 | |
| | 580 | <!-----------------------------------------------> |
| | 581 | |
| | 582 | <h3>Populate the Configuration Database</h3> |
| | 583 | |
| | 584 | <p> |
| | 585 | |
| | 586 | Populate the configuration database that runs on |
| | 587 | <code>chef.isi.deterlab.net</code> by running the <b>load_containers_db.sh</b> |
| | 588 | and <b>load_config_db.sh</b> database-population scripts. |
| | 589 | |
| | 590 | <p> |
| | 591 | |
| | 592 | This should be run on a single physical node in the experiment. |
| | 593 | <code>pnode-0000</code> is used in the example below. |
| | 594 | |
| | 595 | <p> |
| | 596 | |
| | 597 | The <i><expid></i> and <i><projid></i> fields in the following |
| | 598 | example are referring to the experiment ID and the project ID. The |
| | 599 | experiment ID is defined by the user, and could be something like |
| | 600 | "neocont-test" or "netstriping". For now, the project ID should always |
| | 601 | be "Deter". |
| | 602 | |
| | 603 | <p> |
| | 604 | |
| | 605 | <pre> |
| | 606 | $ ssh pnode-0000.<i><expid></i>.<i><projid></i> |
| | 607 | $ cd <i><config_server-repo></i>/bin |
| | 608 | $ ./load_config_db.sh |
| | 609 | </pre> |
| | 610 | |
| | 611 | <p> |
| | 612 | |
| | 613 | This step will be automated in the future. |
| | 614 | |
| | 615 | <p> |
| | 616 | |
| | 617 | <!-----------------------------------------------> |
| | 618 | |
| | 619 | <h3>Node Configuration by Chef</h3> |
| | 620 | |
| | 621 | <p> |
| | 622 | |
| | 623 | The Chef system is used to bootstrap and configure the nodes. All the |
| | 624 | steps for this are enclosed in the <b>bootstrap_node.sh</b> script. |
| | 625 | |
| | 626 | <p> |
| | 627 | |
| | 628 | The script needs to know which node's role in the experiment. There |
| | 629 | are currently three roles: <i>pnode</i>, <i>container</i>, and |
| | 630 | <i>win-container</i>. |
| | 631 | |
| | 632 | <p> |
| | 633 | |
| | 634 | On all the <i>pnode</i>s: |
| | 635 | |
| | 636 | <pre> |
| | 637 | $ ssh <i><pnode></i>.<i><expid></i>.<i><projid></i> |
| | 638 | $ cd <i><config_server-repo></i>/bin |
| | 639 | $ ./bootstrap_node.sh -r pnode |
| | 640 | </pre> |
| | 641 | |
| | 642 | <p> |
| | 643 | |
| | 644 | <center><b><i> |
| | 645 | Is this needed on <u>all</u> the <i>pnode</i>s or just those that are running containers? |
| | 646 | </i></b></center> |
| | 647 | |
| | 648 | <p> |
| | 649 | It is easy to fix problems if something should go wrong with bootstrapped |
| | 650 | nodes. Running "sudo chef-client" will re-configure the nodes (both |
| | 651 | <i>pnode</i>s and the containers). |
| | 652 | |
| | 653 | <p> |
| | 654 | |
| | 655 | <center><b><i> |
| | 656 | This is really inspecific. Are there any limitations to what "sudo |
| | 657 | chef-client" will fix? |
| | 658 | </i></b></center> |
| | 659 | |
| | 660 | <p> |
| | 661 | |
| | 662 | <!-----------------------------------------------> |
| | 663 | |
| | 664 | <h3>Set-up Complete</h3> |
| | 665 | |
| | 666 | <p> |
| | 667 | |
| | 668 | If all the preceding steps succeeded, then your <i>pnode</i>s and containers |
| | 669 | are configured, booted, and ready for use. |
| | 670 | |
| | 671 | <p> |
| | 672 | |
| | 673 | <!------------------------------------------------------------------------> |
| | 674 | |
| | 675 | <h2>5. After Booting the Containers</h2> |
| | 676 | |
| | 677 | <p> |
| | 678 | |
| | 679 | There are a number of things that may be done after the containers are |
| | 680 | configured and booted. These include the following: |
| | 681 | |
| | 682 | <p> |
| | 683 | |
| | 684 | <ul> |
| | 685 | |
| | 686 | |
| | 687 | <li>Login to a container node<br> |
| | 688 | <pre> |
| | 689 | $ ssh <i>pnode</i> |
| | 690 | $ ssh <i>username</i>@<i>containernode</i> |
| | 691 | </pre> |
| | 692 | |
| | 693 | Cygwin is installed on Windows nodes so you can <b>ssh</b> to Windows |
| | 694 | containers as well. |
| | 695 | |
| | 696 | <p> |
| | 697 | |
| | 698 | <li>Play around with Vagrant<br> |
| | 699 | Vagrant is used to control and access the container nodes. Vagrant is used |
| | 700 | from a root shell ("sudo su -") and from the <b>/space/vagrant_home</b> |
| | 701 | directory. |
| | 702 | |
| | 703 | <p> |
| | 704 | |
| | 705 | <table border=1> |
| | 706 | <tr align=center><td><b>Command</b> <td><b>Purpose</b> |
| | 707 | <tr><td>vagrant status <td>confirm containers are running |
| | 708 | <tr><td>vagrant ssh <i>containernode</i> <td>login "vagrant"; password "vagrant" |
| | 709 | <tr><td>vagrant reload <i>containernode</i> <td>reboot a container |
| | 710 | <tr><td>vagrant halt <i>containernode</i> <td>halt a container |
| | 711 | <tr><td>vagrant up <i>containernode</i> <td>boot a container |
| | 712 | </table> |
| | 713 | |
| | 714 | <p> |
| | 715 | |
| | 716 | <li>Login to a Windows desktop<br> |
| | 717 | <ul> |
| | 718 | <li>build ssh tunnel to port 3389 on the <i>pnode</i><br> |
| | 719 | $ ssh -L3389:pcXXX:3389 users.deterlab.net |
| | 720 | <p> |
| | 721 | |
| | 722 | <li>use client RDP to connect to localhost:3389<br> |
| | 723 | login "vagrant"; password "vagrant" |
| | 724 | |
| | 725 | <p> |
| | 726 | |
| | 727 | <li>Play around with <b>knife</b>, the command line interface to Chef<br> |
| | 728 | |
| | 729 | <ul> |
| | 730 | <li>login to the <code>config</code> node |
| | 731 | <li>cd <b>/space/local/chef/chef-repo</b> |
| | 732 | <li>some <b>knife</b> commands: |
| | 733 | <ul> |
| | 734 | <li>knife node list |
| | 735 | <li>knife node show [node name] |
| | 736 | <li>knife --help |
| | 737 | </ul> |
| | 738 | </ul> |
| | 739 | |
| | 740 | </ul> |
| | 741 | |
| | 742 | </ul> |
| | 743 | |
| | 744 | <p> |
| | 745 | |
| | 746 | <!------------------------------------------------------------------------> |
| | 747 | |
| | 748 | <h2>6. Experiment Completion</h2> |
| | 749 | |
| | 750 | <p> |
| | 751 | |
| | 752 | After an experiment is complete, the experiment data must be removed from the |
| | 753 | configuration database. There are two ways this may be done. |
| | 754 | |
| | 755 | <p> |
| | 756 | |
| | 757 | Method 1: On a host which can talk to <code>chef.isi.deterlab.net</code>, |
| | 758 | run these commands: |
| | 759 | |
| | 760 | <pre> |
| | 761 | $ cd <i><config_server-repo></i>/bin |
| | 762 | $ rm_experiment_config.sh -p <i><projid></i> -e <i><expid></i> |
| | 763 | </pre> |
| | 764 | |
| | 765 | <p> |
| | 766 | |
| | 767 | Method 2: The <code>config_server</code> may be called directly: |
| | 768 | |
| | 769 | <pre> |
| | 770 | $ curl http://chef:5320/exp/<i><projid></i>/<i><expid></i>/delete |
| | 771 | </pre> |
| | 772 | |
| | 773 | <p> |
| | 774 | |
| | 775 | <!------------------------------------------------------------------------> |
| | 776 | |
| | 777 | <h2>7. Extensions to Neo-Containers</h2> |
| | 778 | |
| | 779 | <p> |
| | 780 | |
| | 781 | <!-----------------------------------------------> |
| | 782 | |
| | 783 | <h3>Chef Workstation</h3> |
| | 784 | |
| | 785 | <p> |
| | 786 | |
| | 787 | Since the system runs on Chef anyone authorized to push chef recipes to the |
| | 788 | chef server can write custom node configuration code. |
| | 789 | |
| | 790 | <p> |
| | 791 | |
| | 792 | <!-----------------------------------------------> |
| | 793 | |
| | 794 | <h3>Vagrant</h3> |
| | 795 | |
| | 796 | <p> |
| | 797 | |
| | 798 | The system uses Vagrant to spin up the containers, thus any Vagrant-supported |
| | 799 | image can run in a container. However, the image must be downloaded and |
| | 800 | served via HTTP. |
| | 801 | |
| | 802 | <p> |
| | 803 | |
| | 804 | <!------------------------------------------------------------------------> |
| | 805 | |
| | 806 | </body> |
| | 807 | |
| | 808 | </html> |
| | 809 | |
| | 810 | |
| | 811 | |
| 96 | | Remove all existing {{{tb-set-node-startcmd}}} lines as these start the old containers system. This is no longer used. |
| 97 | | |
| 98 | | The final NS file will look something like this. |
| 99 | | {{{ |
| 100 | | set ns [new Simulator] |
| 101 | | source tb_compat.tcl |
| 102 | | |
| 103 | | tb-make-soft-vtype container0 {dl380g3 pc2133 MicroCloud} |
| 104 | | set pnode(0000) [$ns node] |
| 105 | | tb-set-node-os ${pnode(0000)} PNODE-BASE |
| 106 | | tb-set-hardware ${pnode(0000)} container0 |
| 107 | | tb-set-node-failure-action ${pnode(0000)} "nonfatal" |
| 108 | | |
| 109 | | $ns rtproto Static |
| 110 | | $ns run |
| 111 | | }}} |
| 112 | | |
| 113 | | 5. If your experiment does not rely on the existing containers system, you need to tell DETER about your containers before swapping in the experiment so that it can allocate control network addresses for your containers. (The existing containers system does this for you, but since you've not run {{{containerize.py}}}, you must do this yourself.) |
| 114 | | |
| 115 | | On users (or anywhere that can talk to {{{chef.isi.deterlab.net}}}: |
| 116 | | {{{ |
| 117 | | > cd [your config_server repository]/bin |
| 118 | | > ./load_containers_db.sh -f [path to your containers.json file] -p ${PROJID} -e ${EXPID} |
| 119 | | }}} |
| 120 | | |
| 121 | | Note that you only have to do this once per experiment. You do not have to do this before each swap in! Just once to reserve control net addresses from DETER. |
| 122 | | |
| 123 | | |
| 124 | | 6. Swap in the experiment. |
| 125 | | |
| 126 | | 7. Populate the configuration database that runs on {{{chef.isi.deterlab.net}}} by running the database population scripts {{{load_containers_db.sh}}} and {{{load_config_db.sh}}} (This will automated in the future.) This should be run from a physical node in the experiment. I use {{{pnode-0000}}} in the example below. |
| 127 | | |
| 128 | | On a single pnode: |
| 129 | | {{{ |
| 130 | | > ssh pnode-0000.${EXPID}.${PROJID} |
| 131 | | > cd [your config_server repository]/bin |
| 132 | | > ./load_config_db.sh |
| 133 | | }}} |
| 134 | | |
| 135 | | If you are using the existing containers system also load the containers information. |
| 136 | | {{{ |
| 137 | | > ./load_containers_db.sh -p ${PROJID} -e ${EXPID} |
| 138 | | }}} |
| 139 | | |
| 140 | | At this point, the Chef server and configuration database knows everything it needs to about your experiment and the nodes within it. |
| 141 | | |
| 142 | | 8. Let Chef configure the nodes. Bootstrap and configure the pnodes. To configure/bootstrap the node use the {{{bootstrap_node.sh}}} script. The script needs to know which role the node plays in the experiment. There are currently three roles: {{{pnode}}}, {{{container}}}, and {{{win-container}}}. |
| 143 | | |
| 144 | | On all the pnodes: |
| 145 | | {{{ |
| 146 | | > ssh pnode-0000.${EXPID}.${PROJID} |
| 147 | | > cd [your config_server repository]/bin |
| 148 | | > ./bootstrap_node.sh -r pnode |
| 149 | | }}} |
| 150 | | The {{{pnode}}} role will spawn the containers and configure them. |
| 151 | | |
| 152 | | Once nodes are bootstrapped, simply running {{{sudo chef-client}}} will re-configure the nodes (both pnodes and the containers) if something should go wrong. |
| 153 | | |
| 154 | | 9. Remove experiment data from the configuration database once the experiment is complete. |
| 155 | | |
| 156 | | On a machine that can talk to {{{chef.isi.deterlab.net}}}: |
| 157 | | {{{ |
| 158 | | > cd [your config_server repository]/bin |
| 159 | | > ./rm_experiment_config.sh -p ${PROJID} -e ${EXPID} |
| 160 | | }}} |
| 161 | | |
| 162 | | An alternate way to do this is just to make a call on the {{{config_server}}} directly: |
| 163 | | {{{ |
| 164 | | curl http://chef:5320/exp/${PROJID}/${EXPID}/delete |
| 165 | | }}} |
| 166 | | |
| 167 | | ------------- |
| 168 | | |
| 169 | | Fun things to do after the containers are running. |
| 170 | | * Login to a node: |
| 171 | | * {{{ssh pnode-0000}}}. {{{ssh username@[nodename]}}}. Cygwin is installed on the Windows node so you can ssh to Windows containers as well. |
| 172 | | * Play around with Vagrant. To use: a) ssh to any pnode-XXXX, b) {{{sudo su -}}}, c) {{{cd /space/vagrant_home}}} |
| 173 | | * Confirm containers are running: {{{vagrant status}}} |
| 174 | | * ssh to a node (windows or no): {{{vagrant ssh [node name]}}} (login {{{vagrant}}}, password {{{vagrant}}} |
| 175 | | * reboot a container: {{{vagrant reload [node name]}}}. Or halt then restart a node: {{{vagrant halt [node name]}}}, {{{vagrant up [node name]}}} |
| 176 | | * Login to a Windows desktop: |
| 177 | | * build ssh tunnel to port 3389 on the pnode. {{{ssh -L3389:pcXXX:3389 users.deterlab.net}}} |
| 178 | | * use client RDP to connect to localhost:3389. Login {{{vagrant}}}, password {{{vagrant}}}. |
| 179 | | * Play around with {{{knife}}}, the command line interface to Chef. |
| 180 | | * login to the {{{config}}} node |
| 181 | | * cd to {{{/space/local/chef/chef-repo}}} |
| 182 | | * Use knife. |
| 183 | | * {{{knife node list}}} |
| 184 | | * {{{knife node show [node name]}}} |
| 185 | | * {{{knife --help}}} |
| 186 | | |
| 187 | | === Chef Workstation === |
| 188 | | |
| 189 | | Since the system runs on Chef anyone authorized to push chef recipes to the chef server can write custom node configuration code. |
| 190 | | |
| 191 | | === Vagrant === |
| 192 | | |
| 193 | | The system uses [https://www.vagrantup.com/ Vagrant] to spin up the containers, thus any [https://atlas.hashicorp.com/boxes/search vagrant supported image] run in a container. The image must be downloaded and served via HTTP though. |